Sharing a file to my friends with amazon S3
As I was sharing VPN services to my friends, every time when some modifications was made e.g. change of ip address, removed a server, added a new server and so on, I need to send them the configuration file. Since my service was used by over 10 friends, I need to send them the new file one by one. It is really annoying. I hope to find a way to share the file with them automatically.
As there is a new feature from some of the shadowsocks client called “Subscription” which you give a link of config file on the internet and the client will automatically manage and update the config file from the link provided. So I decided to use Amazon S3 to host my config files and share the link of file to my friends.
So let’s get started. First we need to create a bucket on Amazon S3. You can follow the official guide to create a bucket.
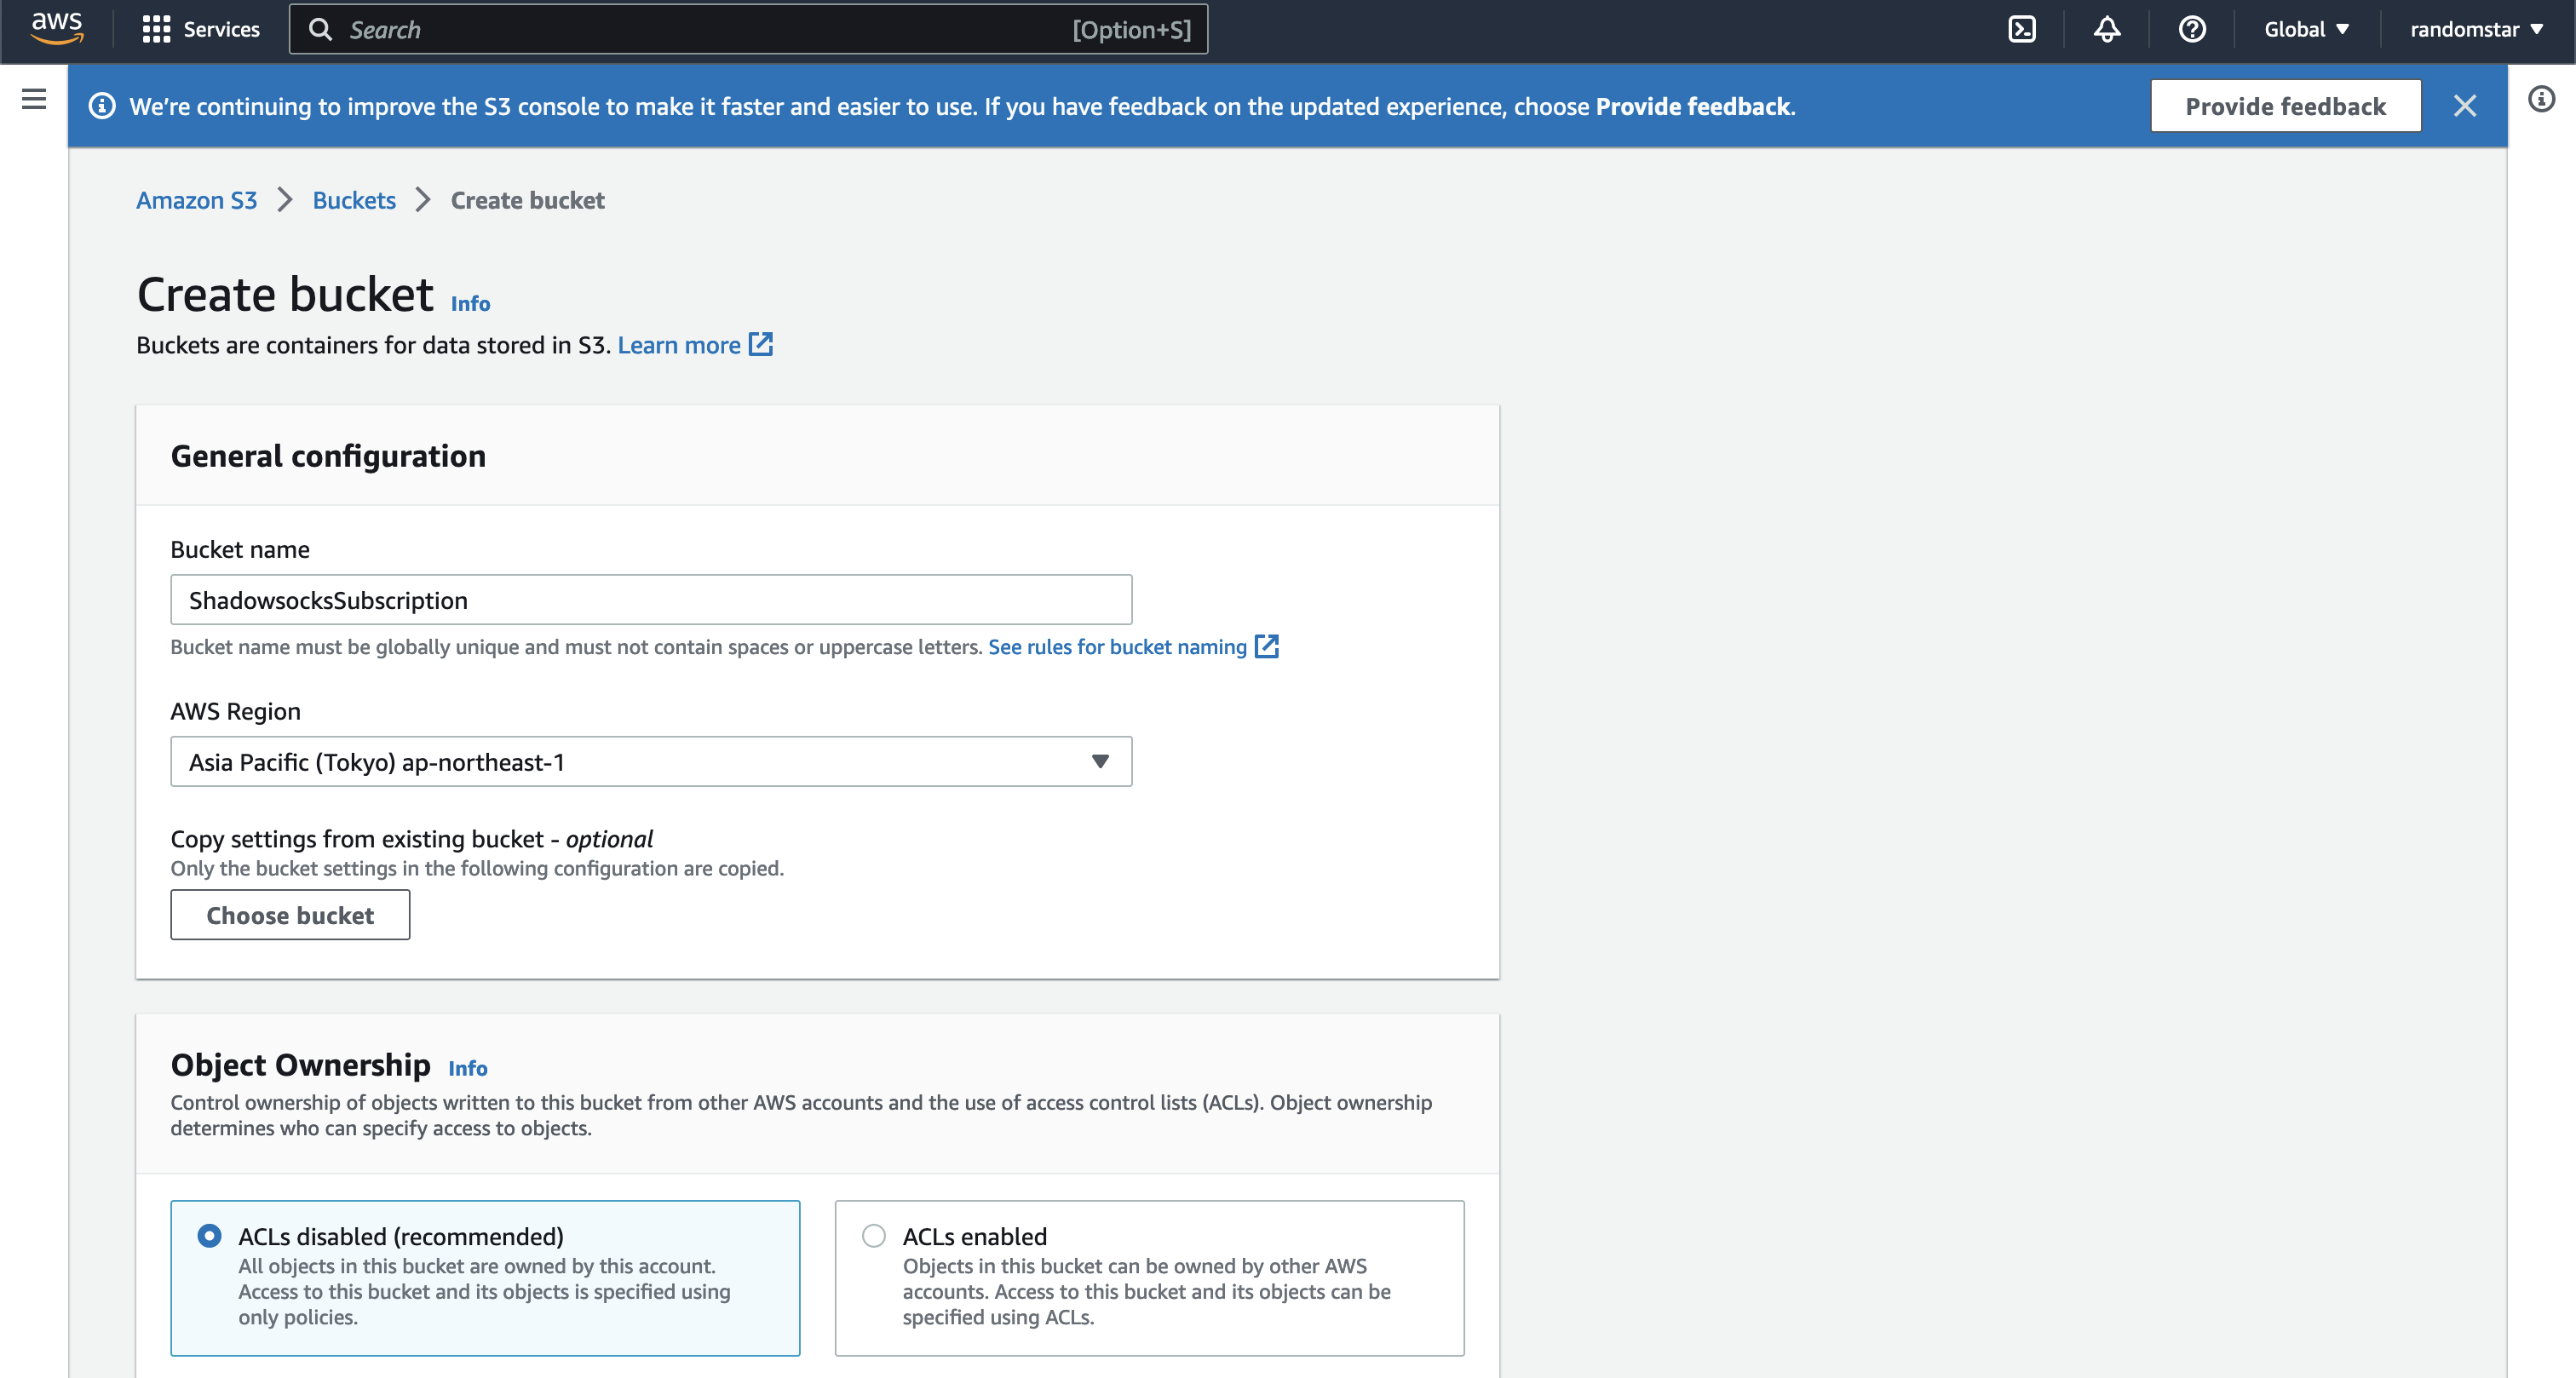
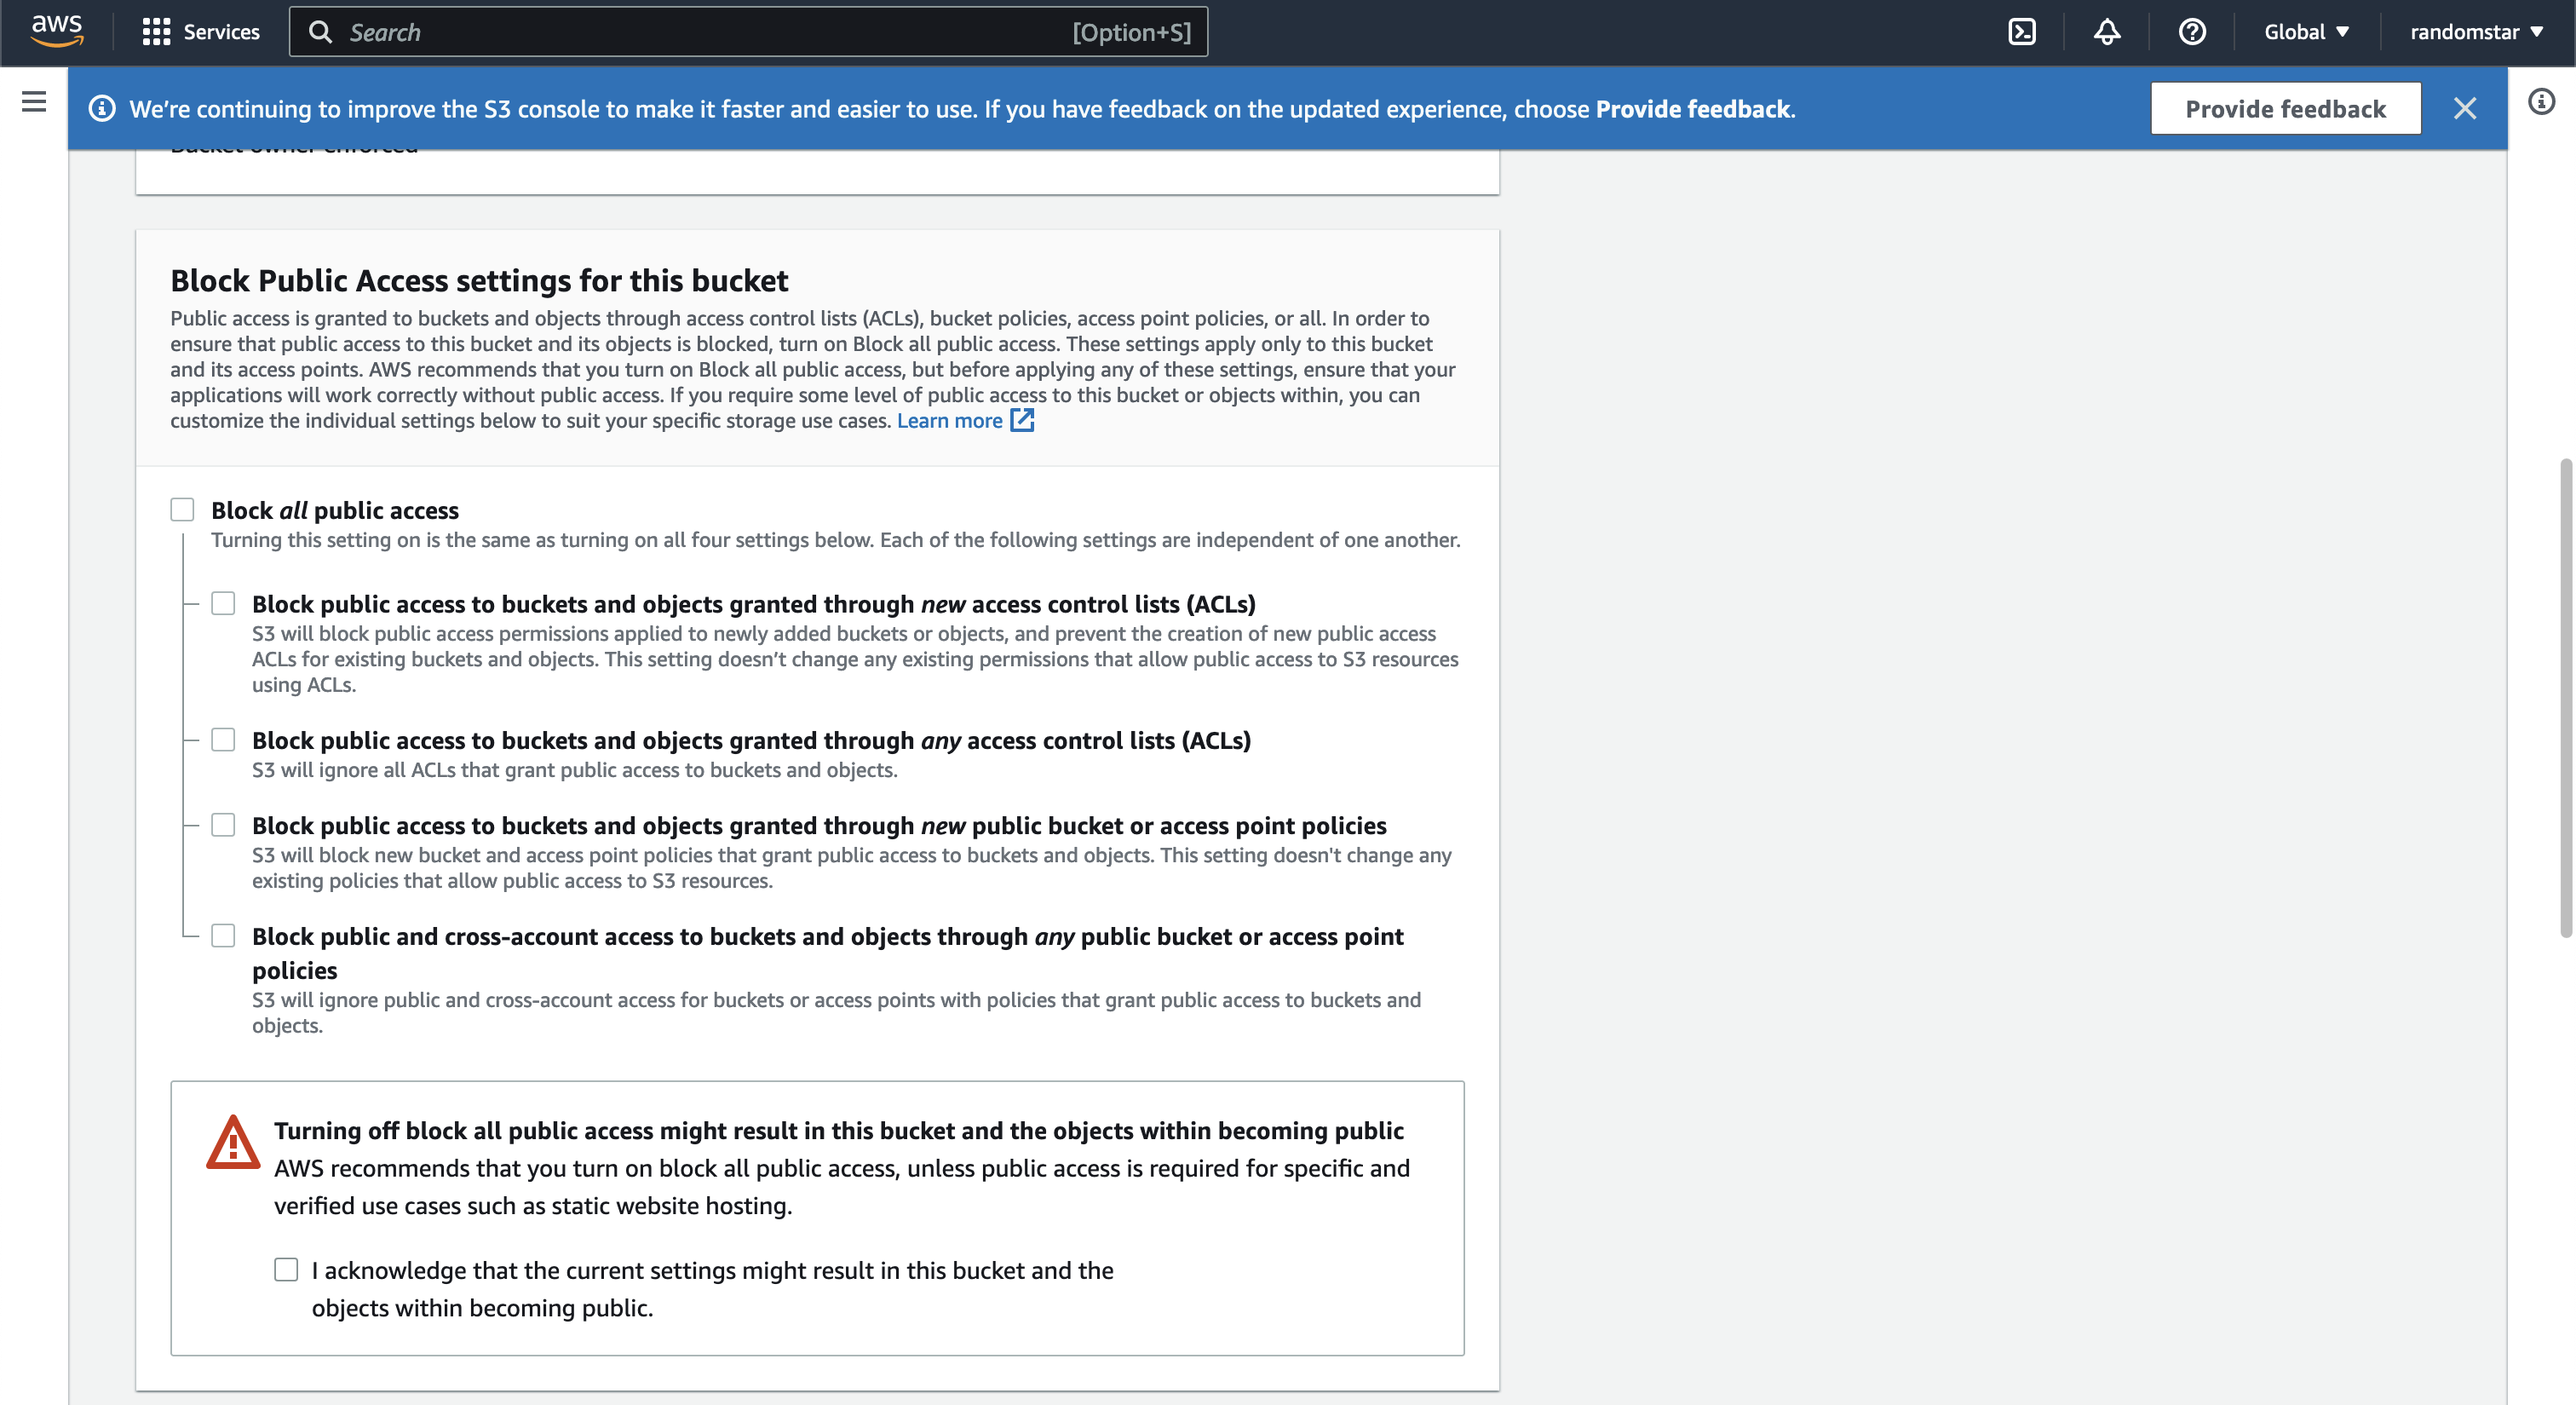
When we are creating the bucket, as I hope that my friend can freely access the file I store, the bucket policy should be set to public.
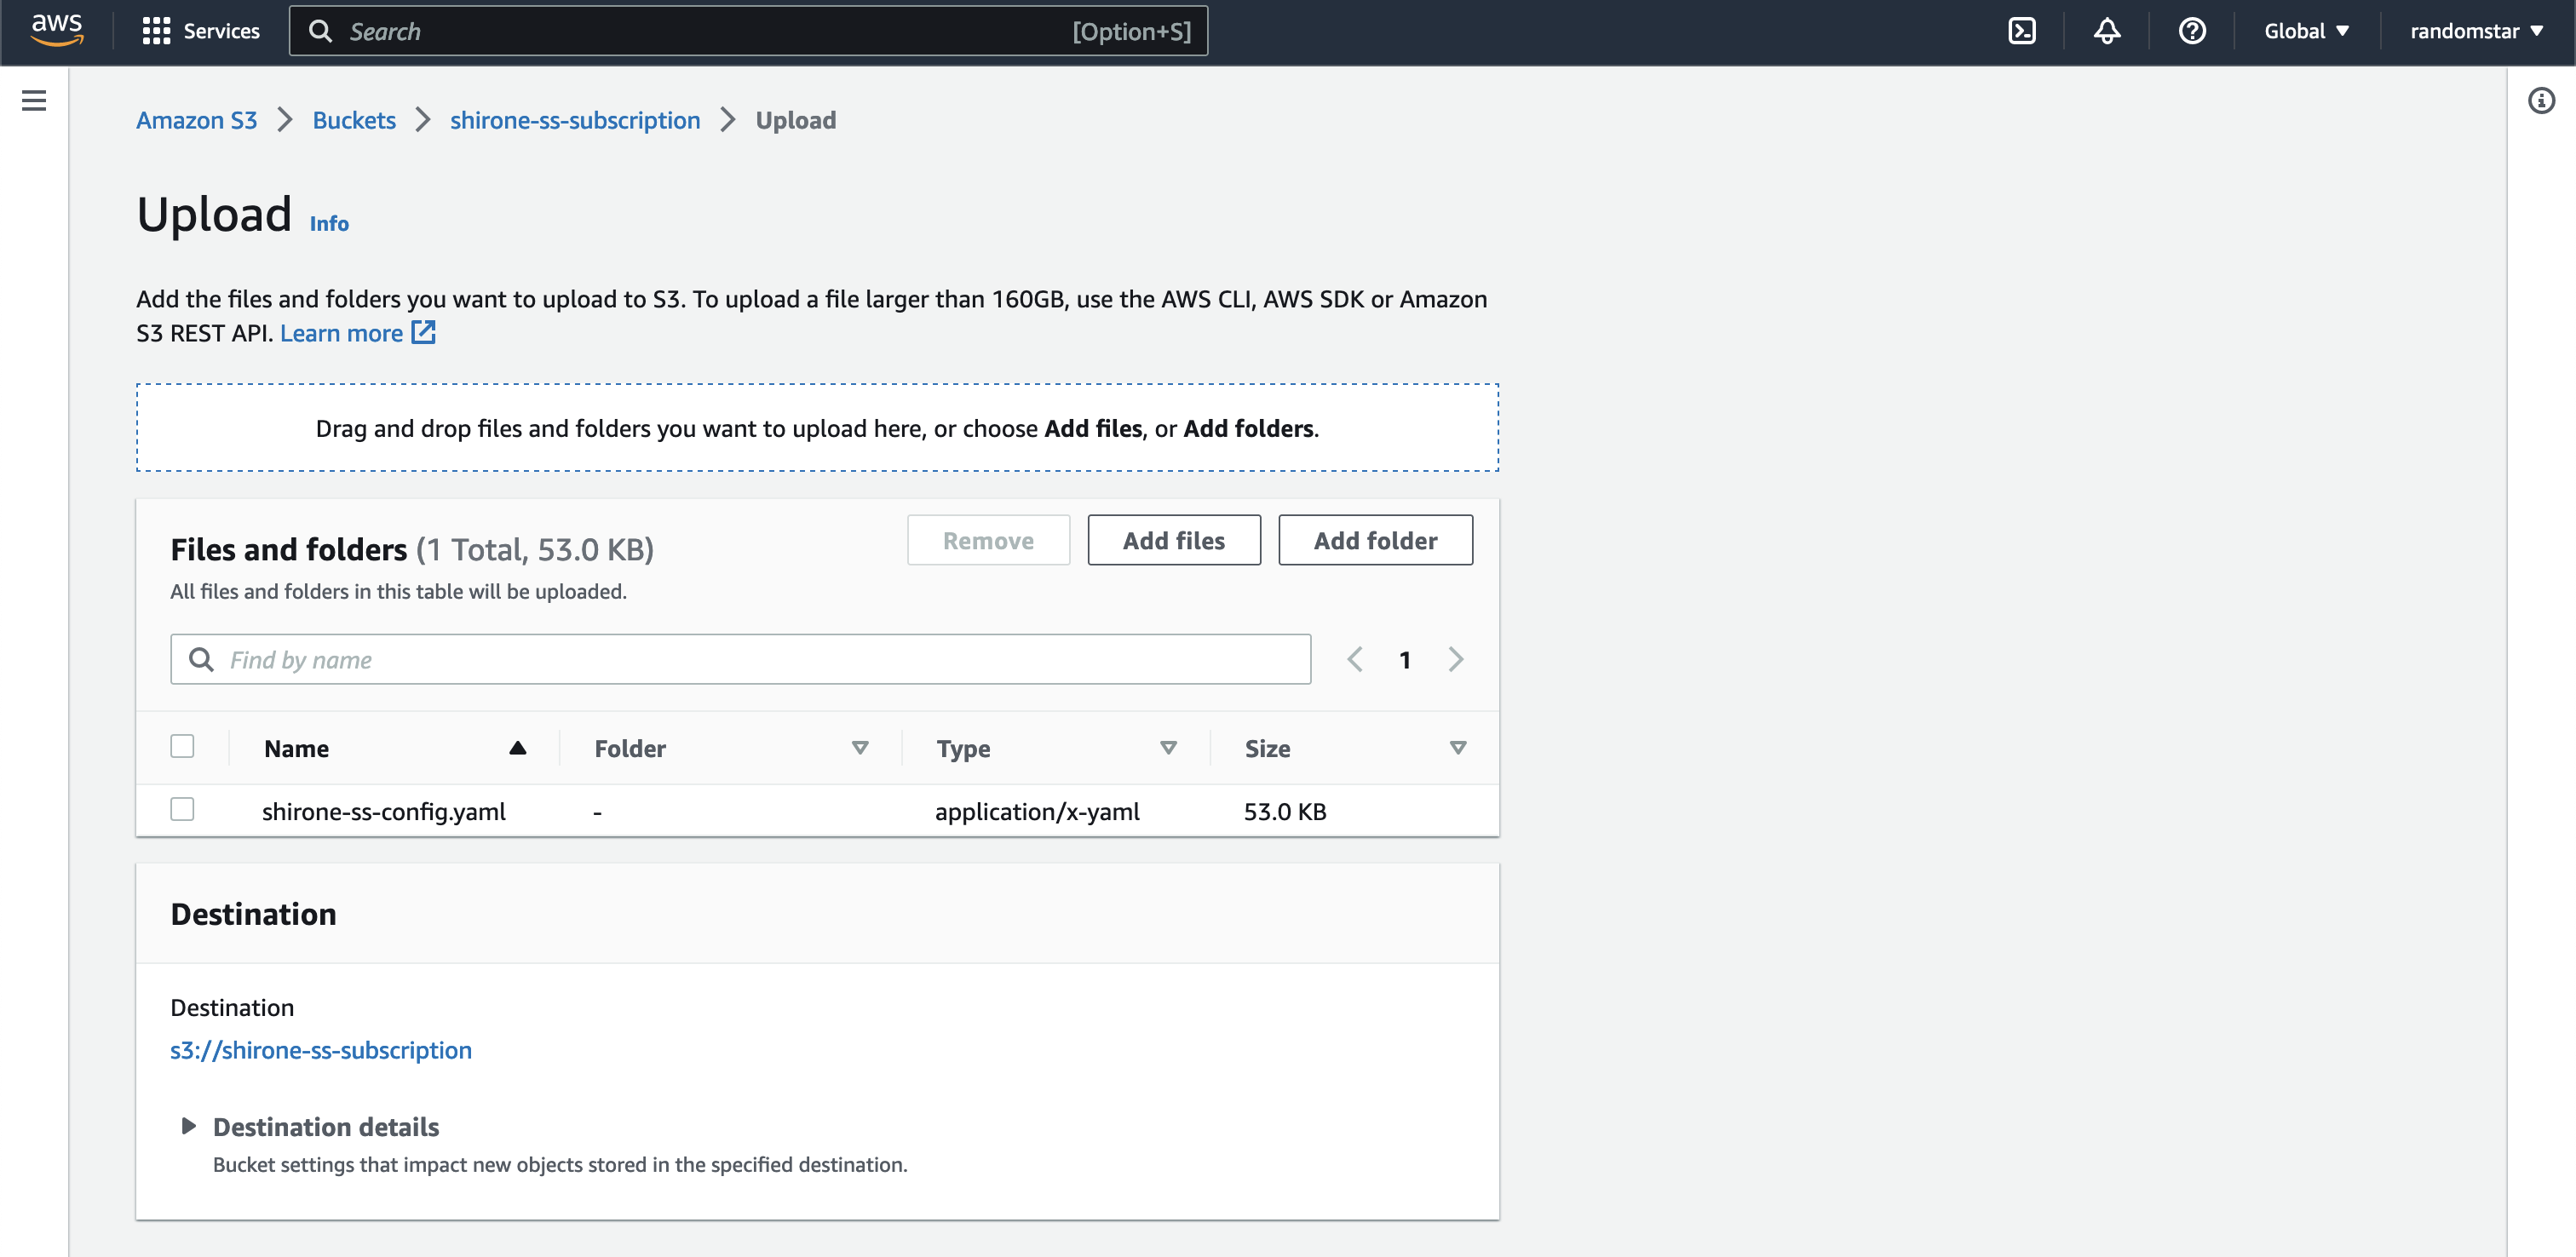
After the bucket is created, we can upload our config file to the bucket. Choose the shadowsocks config file and click “Upload”.
After the file is uploaded, we can get the link of the file. Click the file name and you will see the link of the file.
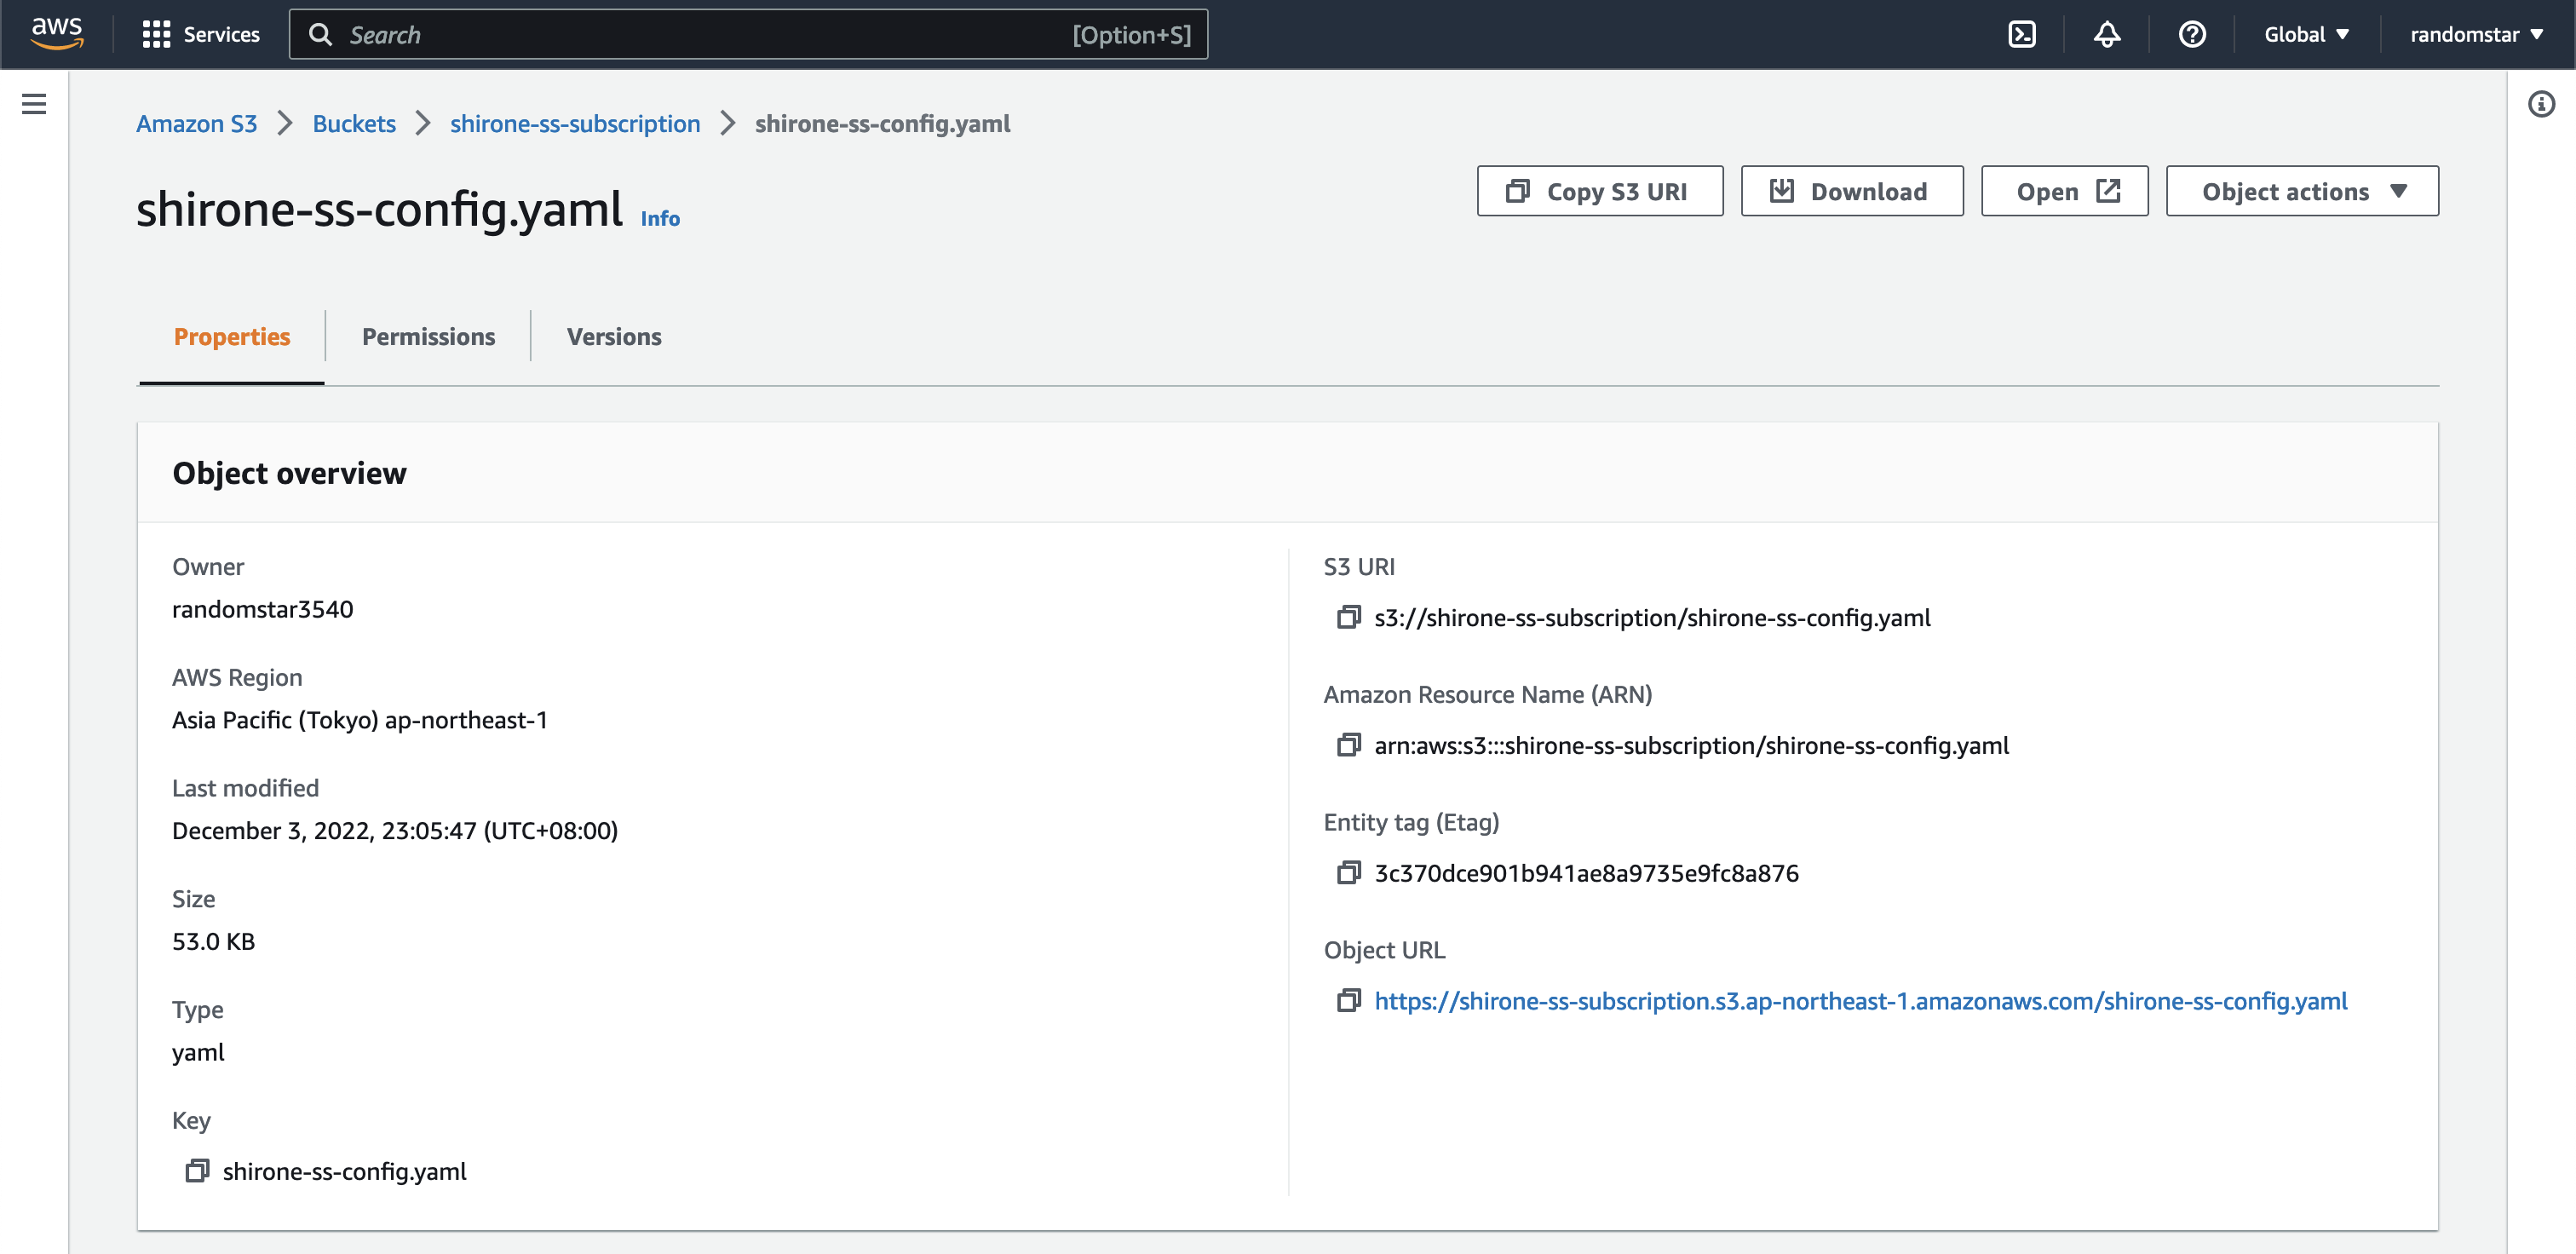
But the link is not working…
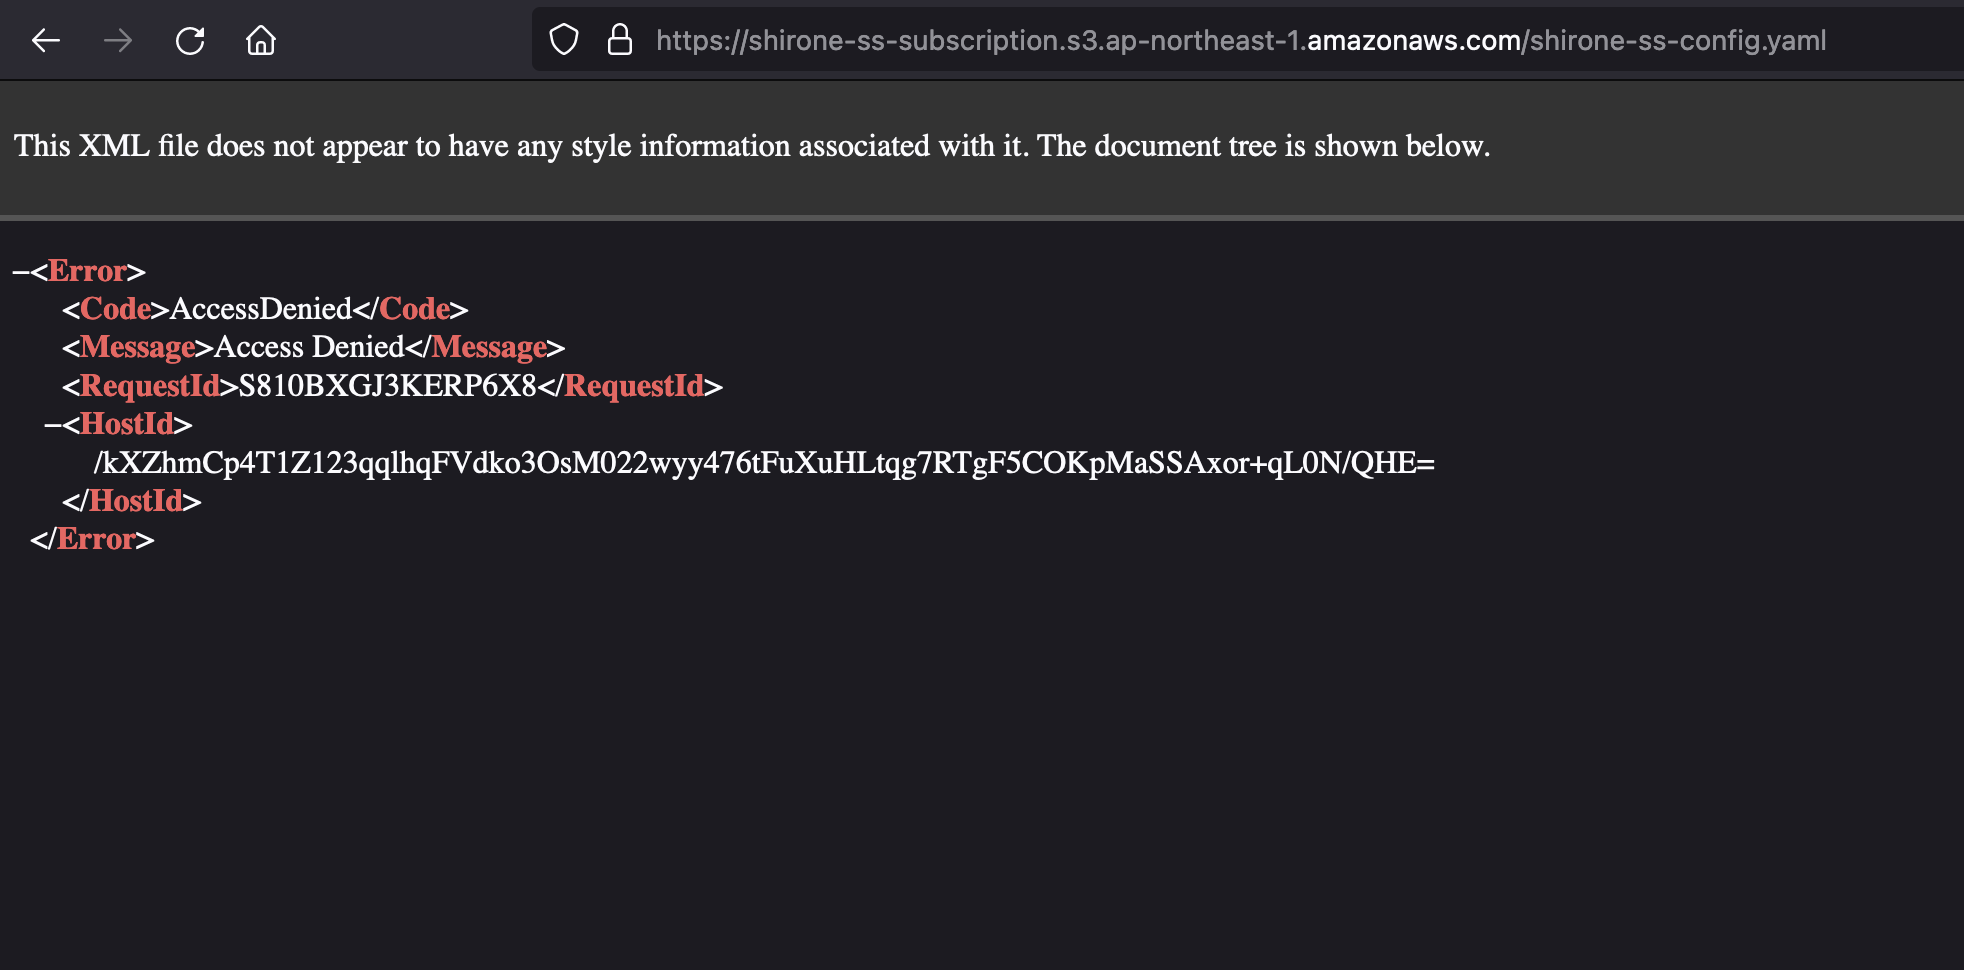
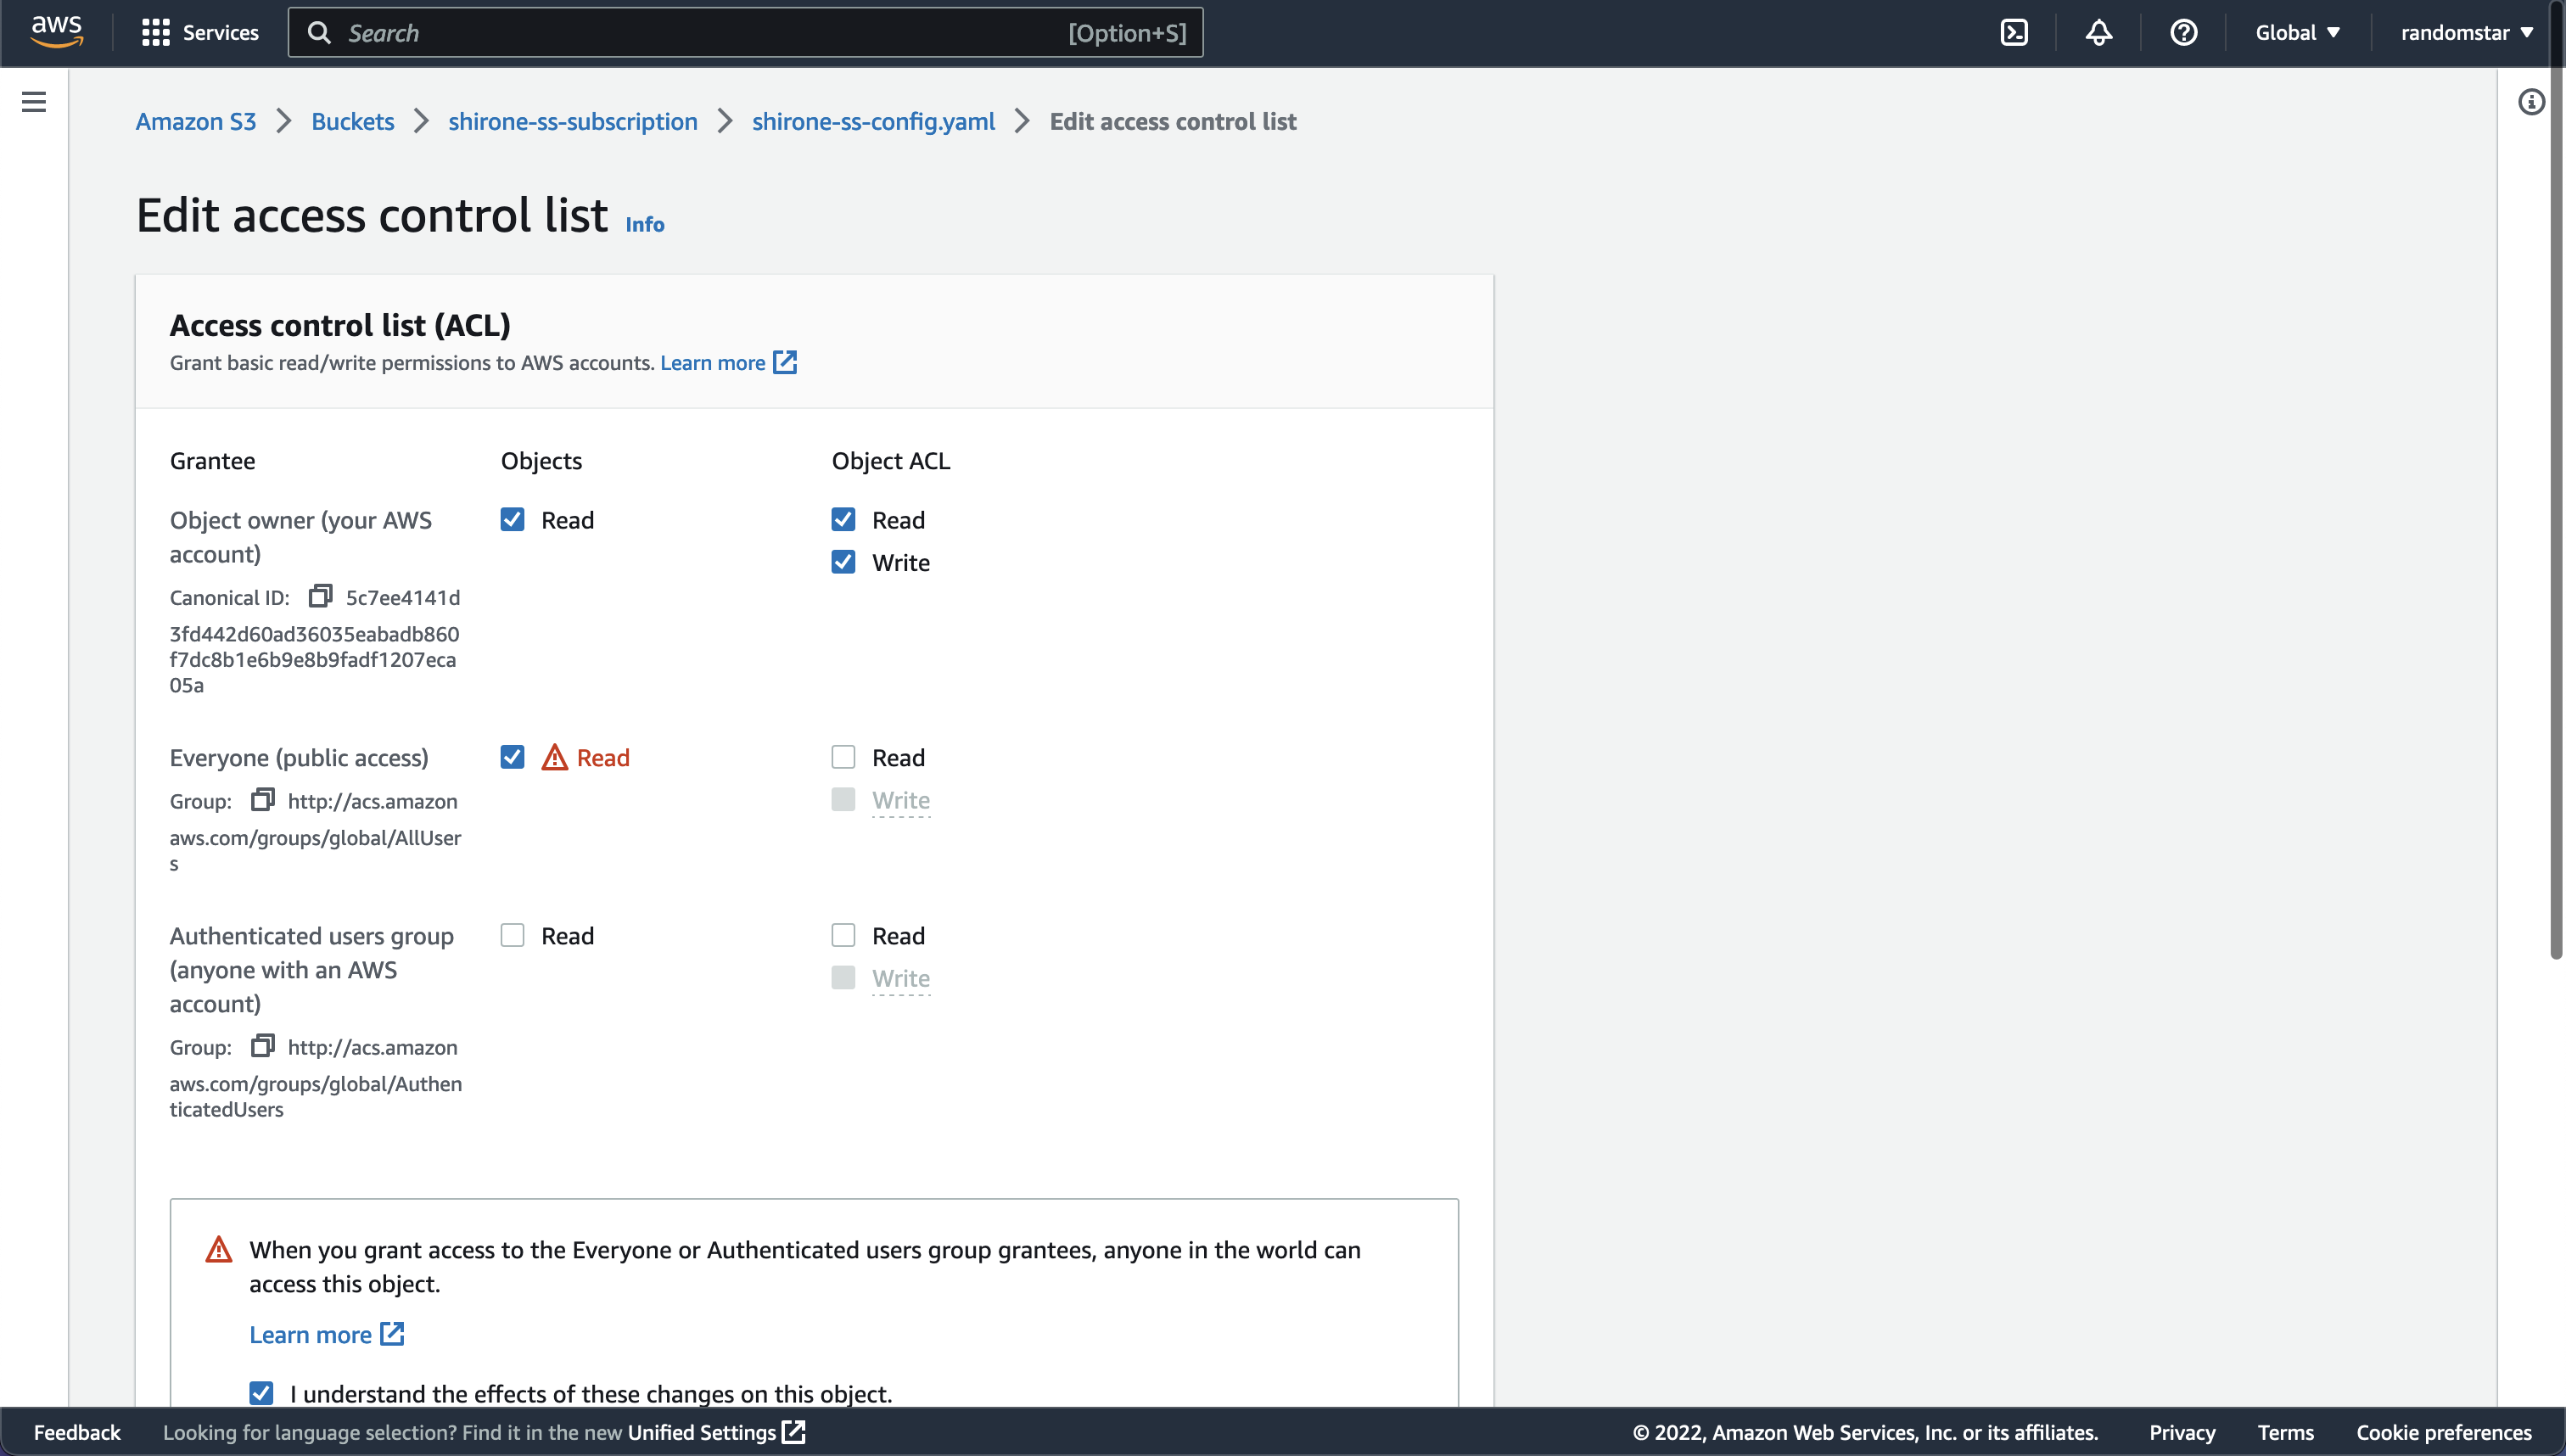
We also need to edit the permission of the file object. Click the file name and click “Permissions” on the left side bar. Then click “Edit” on the “Access control list” section. Grant “Read” permission to “everyone”.
Now we can share the link to our friends. They can access the file directly. But the link is too long. And also I want to map my own domains to this S3 bucket. So I need to create a CloudFront distribution.
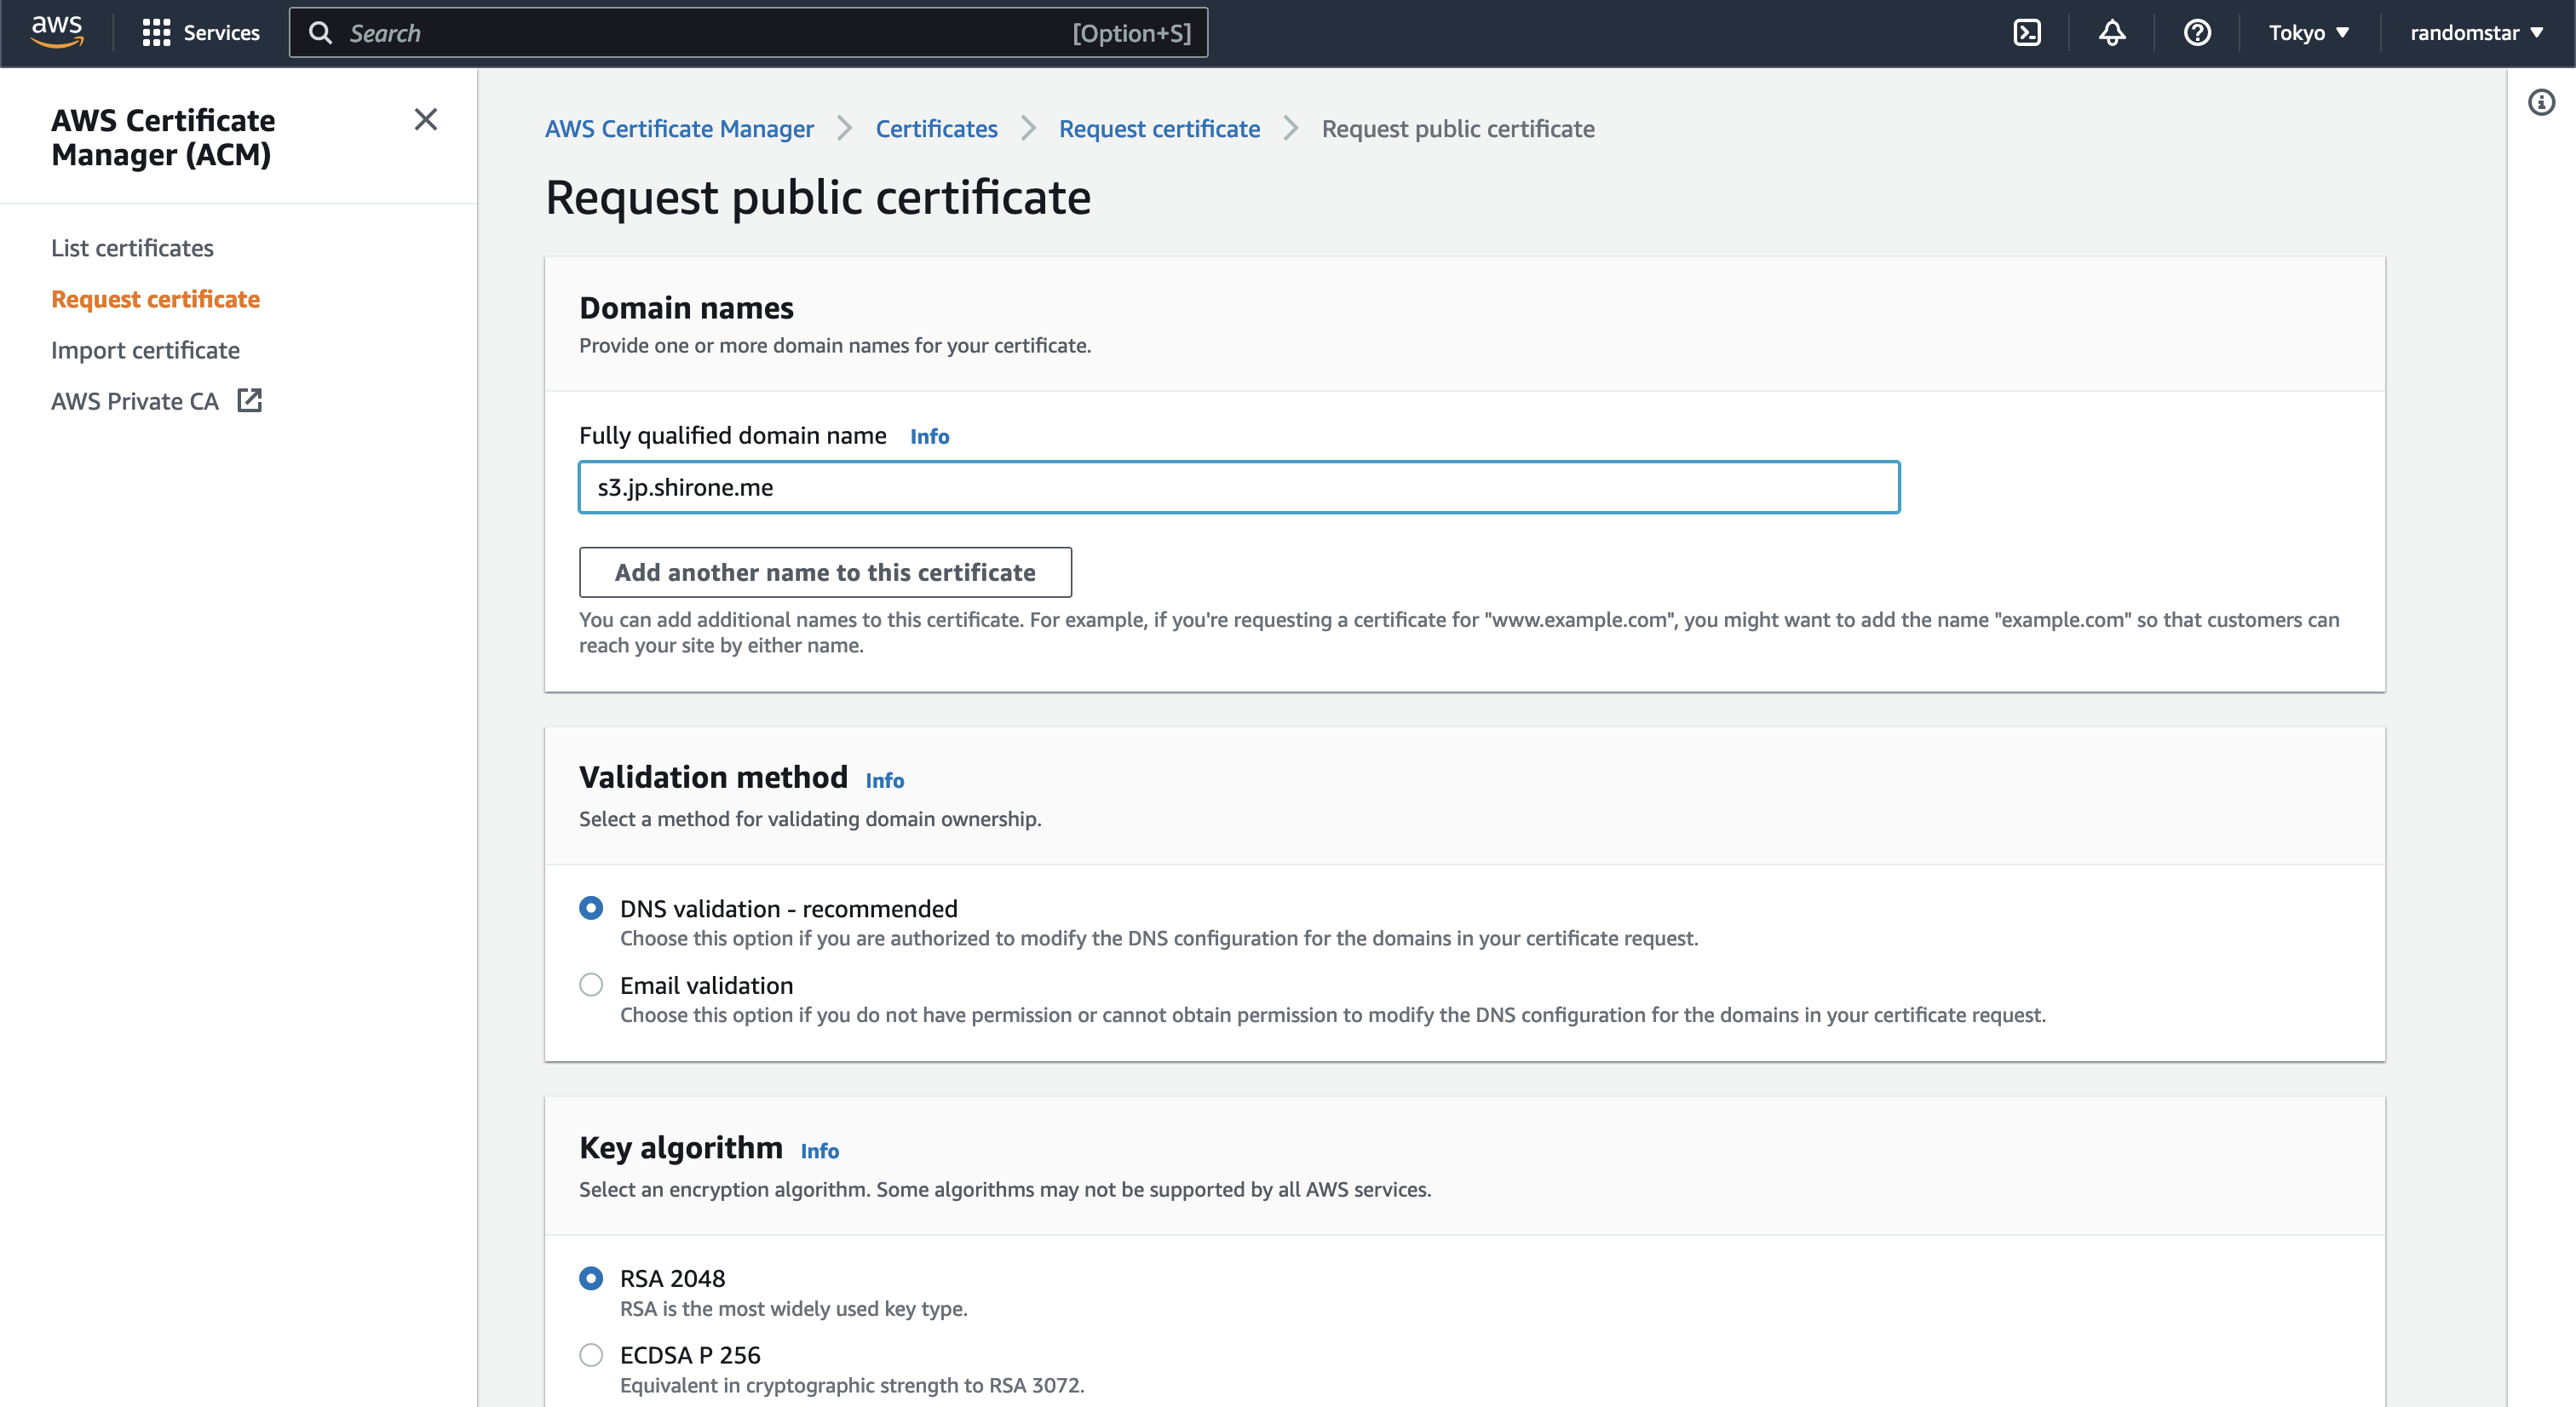
First of all I need to use AWS certificate manager to create a certificate for my domain. The location of the certificate must be in the zone “us-east-1” in order to work with cloudfront. In this screenshot I’m still in the zone “tokyo” so i was failed at first.
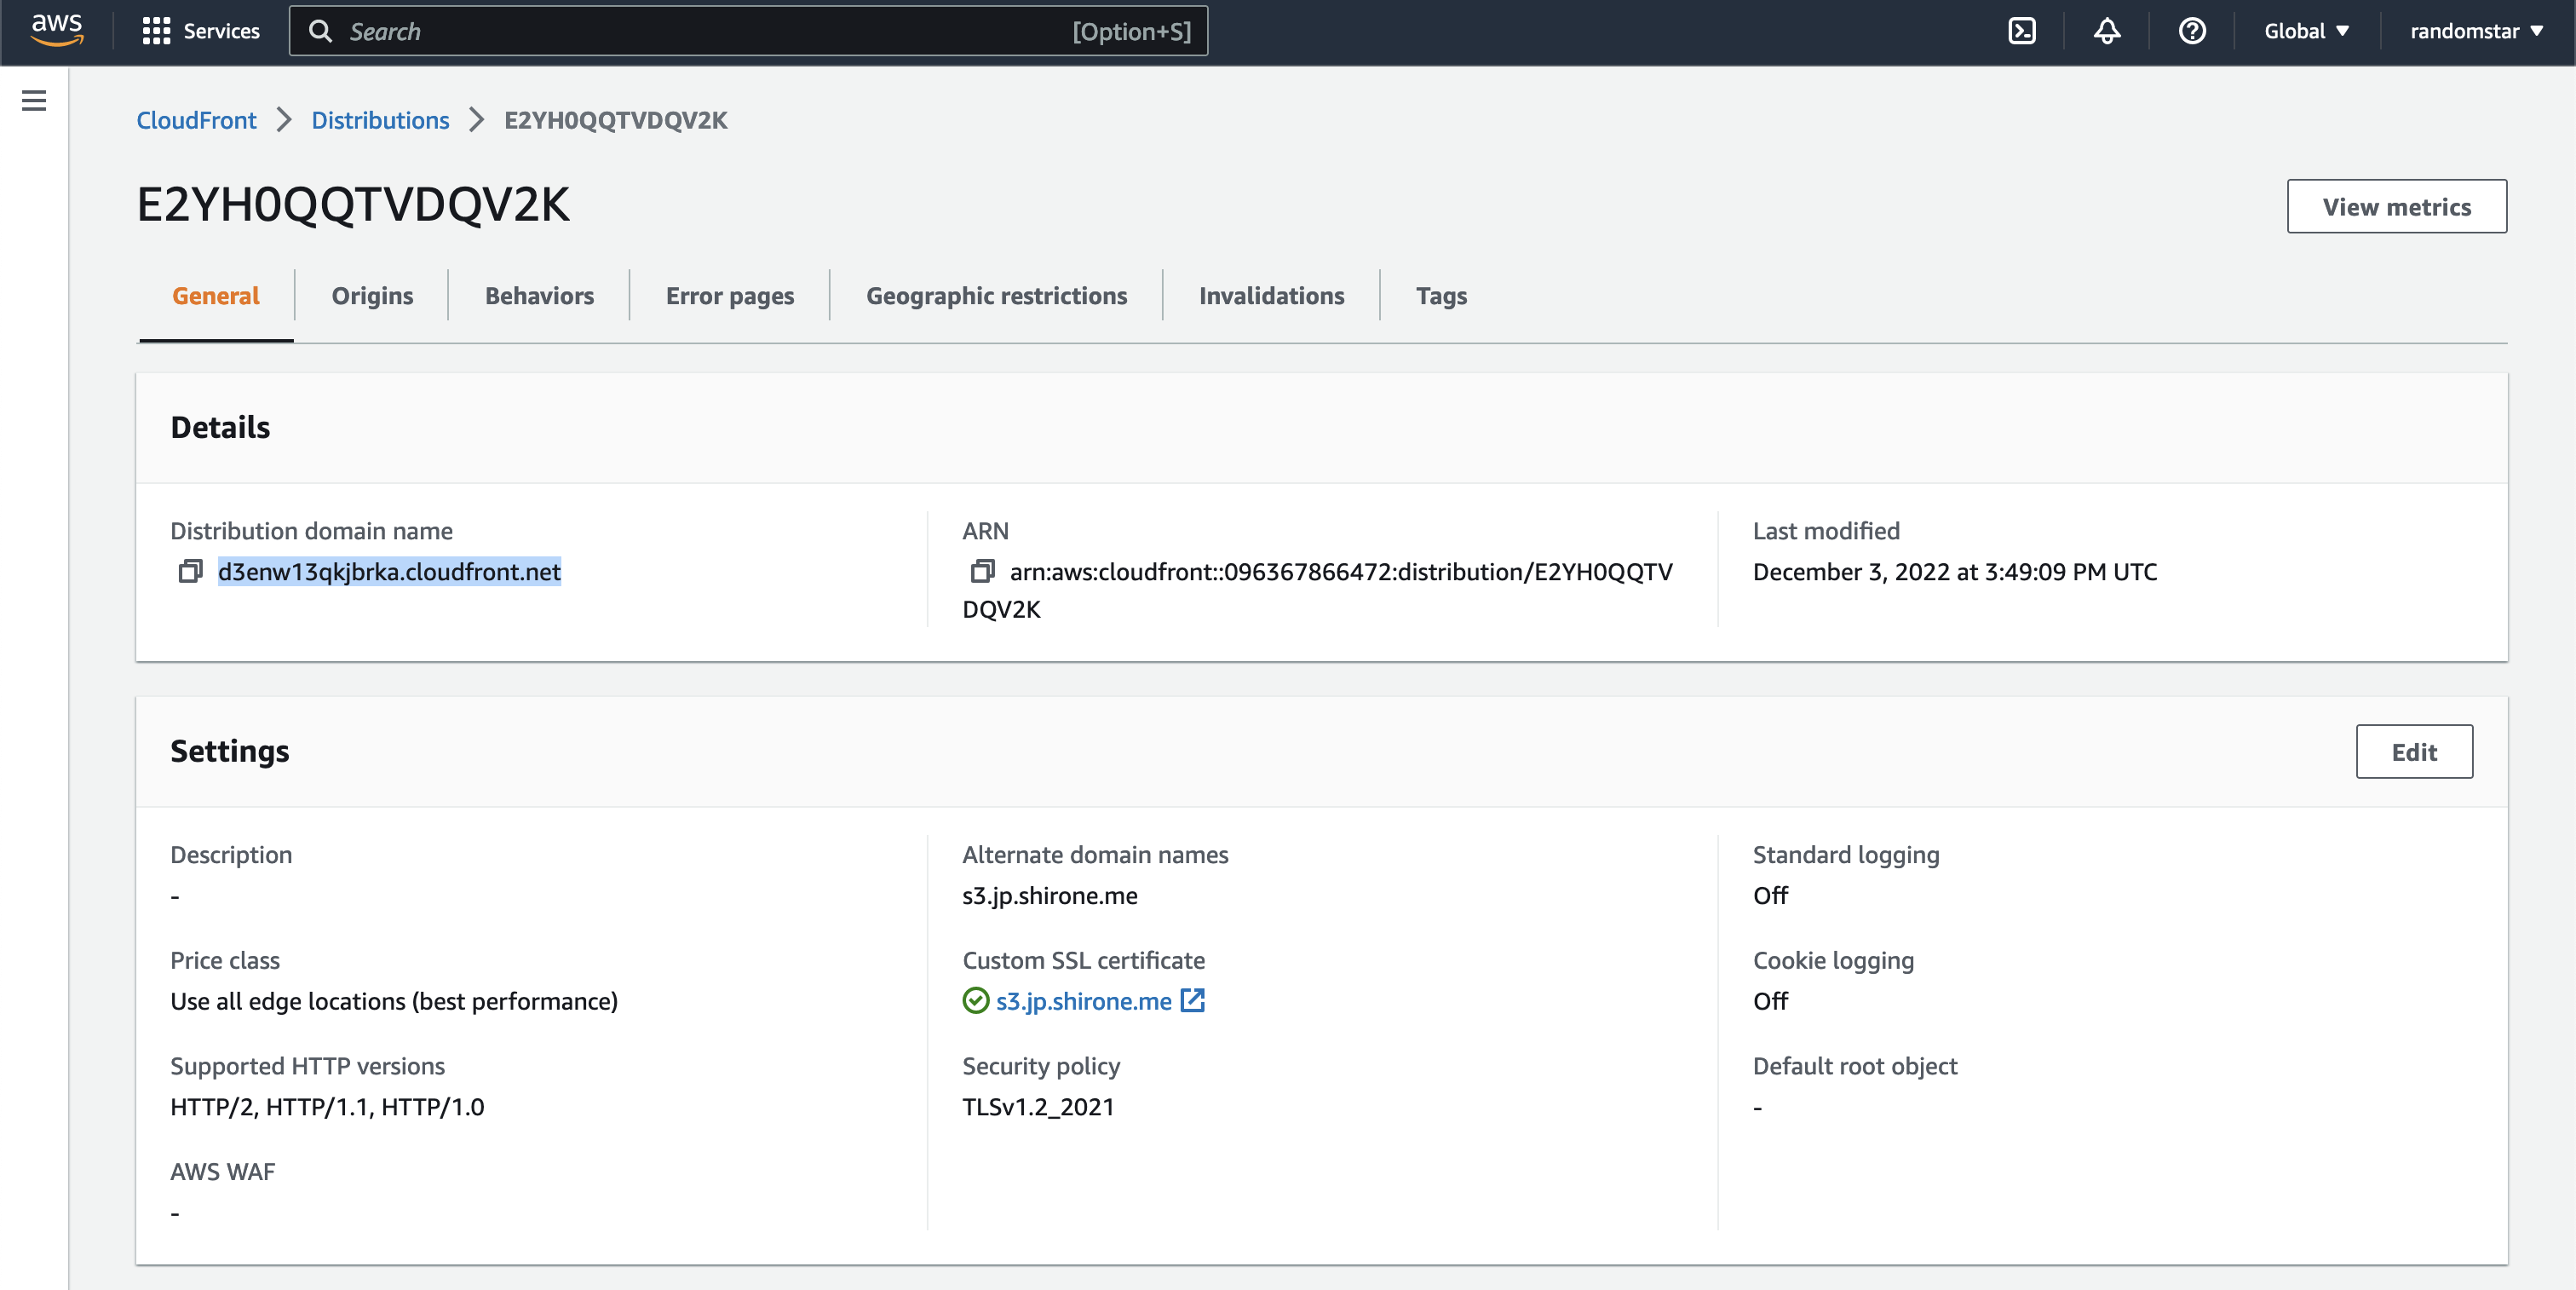
After the certificate is created, we can create a cloudfront distribution. Selecting the “origin domain” to be the S3 bucket we created before. Edit the “Viewer protocol policy” to “Redirect HTTP to HTTPS” in order to prevent network traffic detection. And also we need to set the “Alternate domain names (CNAMEs)” to our own domain. In this case I’m using “s3.jp.shirone.me”. And also we need to set the “SSL certificate” to the certificate we created before.

After the cloudfront distribution is created, we can find its domain name. Which is end with “.cloudfront.net”. We need to go to our domain provider and create a CNAME record to map our domain to the cloudfront domain.
Then, we can access our file with our own domain! All done!
[Update]
In the previous steps need to set both the ACL of the bucket and the object to public. Actually it is quite complicate since once we updated the file I need to manually set the ACL of the object to public again.
Actually, AWS provided an easier way called “Origin Access Identity” when we are creating a new origin point in cloud front. With this, we only need to set up an bucket policy once to allow Cloudfront to access the objects in our bucket. Then, both object and bucket don’t need to be public any more, since cloudfront will fully handle the content delivery and the original object link in s3 will not be public accessible any more. It is actually much more convenience and security than what we did before.

We can also enable versioning - which allows us to keep a backup of these config files once they are updated.
